In this post I’m going to cover the basics for creating a simple Terraform configuration for use with GCP. We’re going to setup a bare bones Terraform config that will store the Terraform state file on a GCP bucket via a custom backend configuration and test it out by running some Terraform commands. This is what I call a Level 0 (If you’ve ever watched Kung Fu Panda … “There is now a Level 0”).
What you’ll need:
- An existing project on GCP (mine is called ‘sandbox’) with sufficient permissions (ie, project Owner or Editor)
- Create a bucket that you can write to (I’m using a regional bucket called ‘vpt-sandbox-tfstate’ — create a unique one)
- A code editor (I’m using Visual Studio Code (vscode) and will be using a Terraform extension)
- An installed version of Terraform (Installation notes here. I’m running on Ubuntu)
Cheat Sheet:
Here are some useful terraform commands:
- terraform init
- terraform apply
- terraform destroy
Download the source code for this example.
Let’s Get Started!
Before we begin writing Terraform configs, lets talk about Terraform state files briefly. Terraform generates state files that serve as the ledger of what infrastructure has been deployed on the provider (ie, GCP). The preservation and protection of Terraform state files is incredibly important since they are the audit logs of what has been deployed. In this example I’m going to store the state files on a GCP bucket so that I reduce risk of losing my state files.
Terraform State Files and a GCS Bucket
Via the GCP Console, or gcloud CLI — whatever you choose, create a bucket in your sandbox project. For this exercise since it is not mission critical, it can be a regional bucket with autoclass. In this exercise my bucket is called ‘vpt-sandbox-tfstate’
Pro Tip: For mission critical applications, it’s good idea to have a dedicated project with minimal members with scoped permissions for the Site Reliability Engineers and configure your bucket manually outside of Terraform to avoid “terraform destroy” of the bucket, and set your bucket to be multi-regional with revisions. That’s outside the scope of this example. For this example a regional bucket in your sandbox project is sufficient.
Let’s Write Terraform Configs
In vscode, create a new folder (mine is called level0). Within level0, create the following files:
- backend.tf
- main.tf
- variables.tf
backend.tf — telling Terraform where to store state files:
In the backend.tf file we’re going to tell Terraform where to store the state files. We’re going to use the bucket we created in the “What you’ll need” section above. Here’s the contents of my backend.tf:
terraform {
    backend "gcs" {
        bucket = "vpt-sandbox-tfstate"
        prefix = "terraform/state/sandbox/level0"
    }
}
Let’s review. In the code above,
- We set Terraform to use the backend “gcs” which means we’re going to use a bucket on GCP.
- We specify a bucket name (use the one you created above).
- We set a prefix where Terraform will write the state files to. For now, follow my example for the prefix.
Now let’s setup our variables.
variables.tf — the basics:
We’re going to use a variables file within Terraform to get some initial exposure on how to use it. They can be a useful tool for tuning a configuration. In your variables.tf file, add the following:
variable "gcp-project" {
    type = string
    description = "GCP Project to use, ie sandbox"
}

variable "region" {
    type = string
    description = "Specify a region, ie, us-central1 | us-east1 | ..."
}

variable "vpc-name" {
    type = string
    description = "Specify the name of the vpc to be created, ie my-vpc"
}
Let’s review.
We’ve declared three variables: gcp-project, region, and vpc-name. Each variable is declared with a type set to ‘string’, and each one has a unique description. We didn’t edit the vpc.tf yet — it’s ok to be empty. (We’ll see the variable description fields come into focus when we apply our terraform configuration in a later step.)
Pro Tip: variable files are one way to add the ability to dynamically set parameters in Terraform deployments. In future topics I’ll cover Terraform workspaces, locals, and string manipulation approaches to show how we can enable even more approaches to creating dynamic Terraform configurations via code re-use vs hard coding Terraform configurations.
main.tf — let’s declare the provider block:
Add the following to your main.tf file:
provider "google" {
    project = var.gcp-project
    region  = var.region
}
Here we can see that we’re telling Terraform to use the ‘google’ provider and within that block we’re referencing our variables for gcp-project and region. Those variables aren’t currently set to anything yet but we’re about to change that.
Terraform Commands — Let’s use terraform init and terraform apply:
We’ve now configured basic versions of a backend.tf, variables.tf, and main.tf. Now it’s time to initialize our Terraform config and verify that it’s working as we expect.
Open a bash terminal and go to the level0 directory:

Let’s initialize our Terraform config. First you’ll need to authenticate to GCP. Run the following commands:
gcloud auth application-default login
# and
gcloud auth login
Next we’re going to initialize our Terraform config via terraform init:
terraform init
In a bash terminal:
terraform initThe output should look similar to the following:

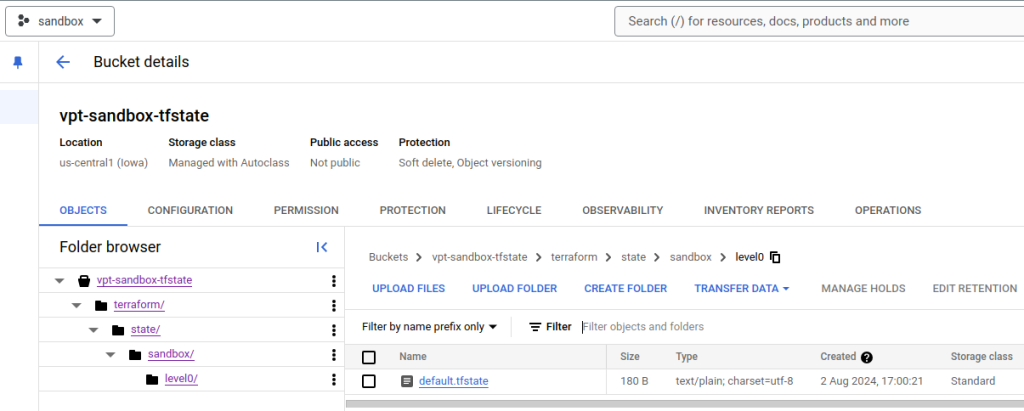
Check your local directory and you’ll see some new terraform files but what’s really interesting is that Terraform wrote content to the GCS bucket prefix with initilization data.

terraform apply
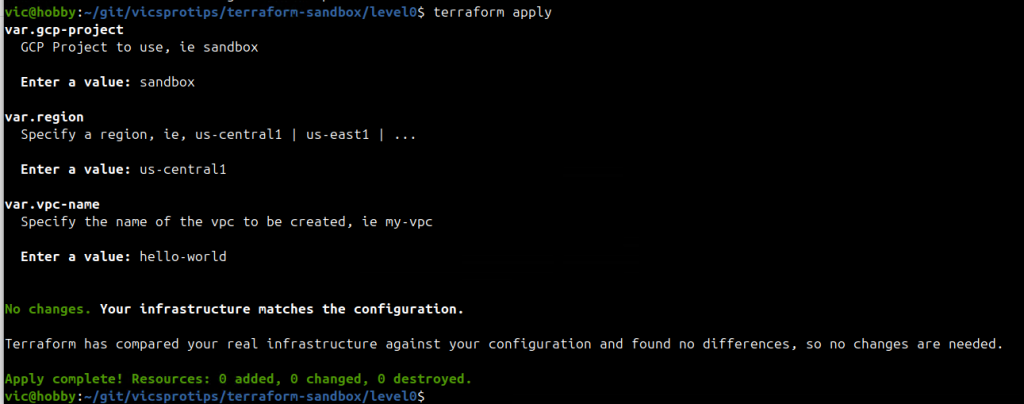
Now it’s time to pull it all together and apply our terraform configuration. For expectation management, we didn’t actually define any infrastructure — we merely established a ‘level0’ baseline from which we can build more advanced Terraform configs. With the expectation management set, let’s run ‘terraform apply’ from within the level0 directory:

Wow — now we can see what the description fields were for in the variables.tf are used for. Since we didn’t set a ‘default’ value in the variables block, Terraform prompts us when we run ‘terraform apply’.
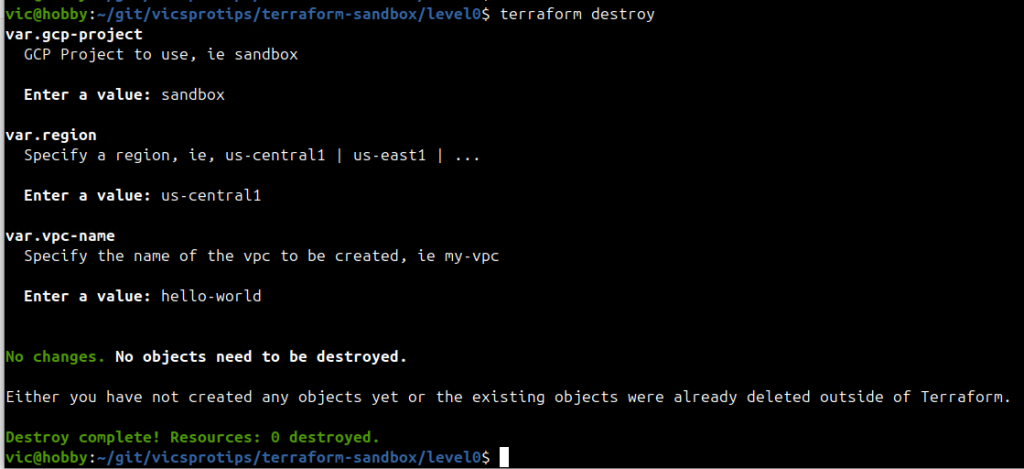
Note how Terraform detected no changes and therefore isn’t configuring any infrastructure, yet it did initialize a state file on our bucket. We can verify this by now running ‘terraform destroy’ as shown below:

Success! In the next installment of this Terraform series I’ll show you how to provision infrastructure on GCP building off of this level0 foundation. “There is now a level zero.”