This post will demonstrate how to use VS Code with containers for development and rapid prototyping.
For reference, review this link from code.visualstudio.com. The link does a great job covering the topic but it leaves some crucial aspects out. This post is here to help.
Before you begin, add the following extension to your VS Code environment:
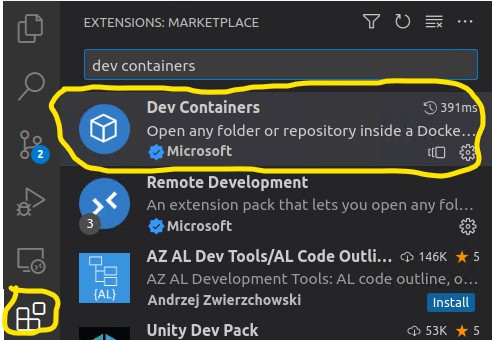
Using a VS Code Template:
Once the extension is installed, create a new folder in your VS Code explorer. In this example I’ll call it devContainerExample1.
Now, from the File menu, open this newly created folder so that it is the only folder in your VS Code Explorer. File > Open Folder > /path/to/devContainerExample1
IMPORTANT — This is one of the items that the official documentation skipped over — the following is going to put auto generated files into the root of the folder that you opened. If you’re like me, I typically have my entire ~/git folder open in VS Code, which would put the following autogenerated files in my ~/git instead of where I want them under the ~/git/…/devContainerExample1 folder.
The next steps will automatically put files in the root of your explorer window. We don’t want that — we want the files to be placed within the devContainerExample1 folder.
Press F1 and type Dev Containers

Select The option I’ve highlighted above.
Click on “Show All Definitions” and scroll down to Python3 and click it.

You’ll be prompted for a version. I chose 3.11 for this example.

You’ll then be prompted for additional features to install within the container. Skip this for now and press “OK”

VS Code will now autogenerate code and place it in your devContainerExample1 folder.
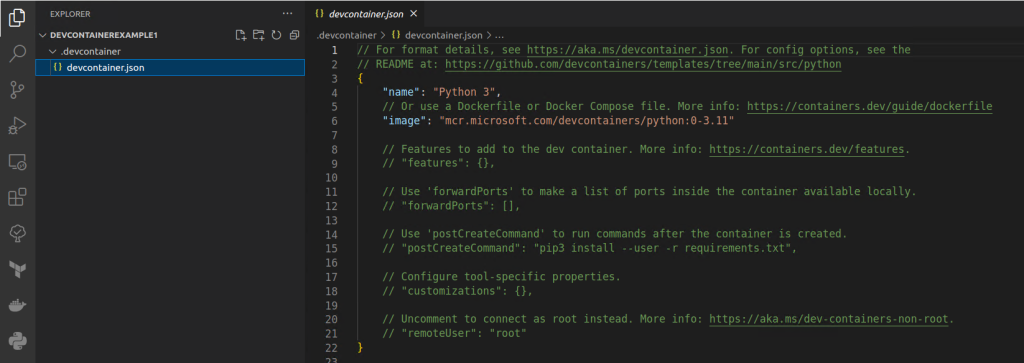
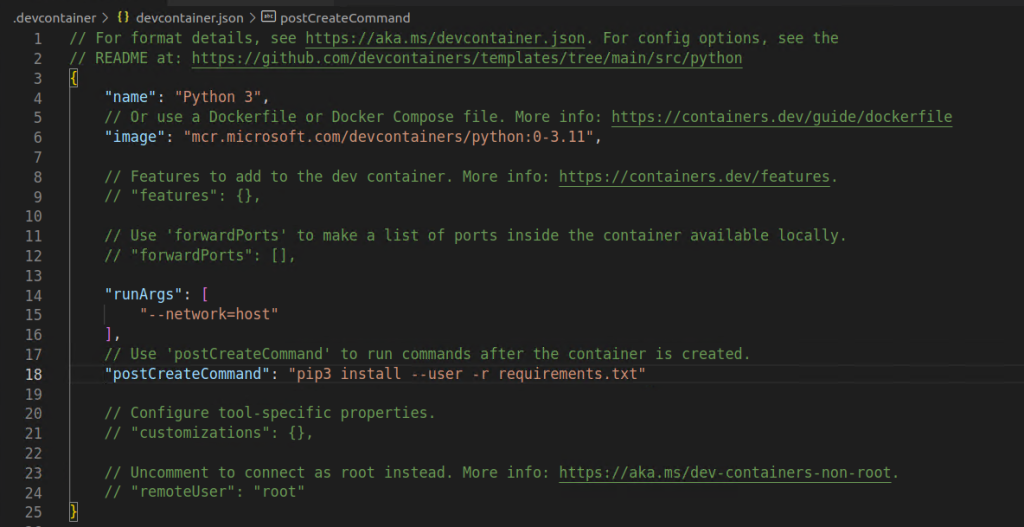
Let’s edit the generated json. Update yours so that it looks like the following. I’ll past the contents below the image. (Hat tip to Joe for figuring out the runArgs option below regarding Docker networking so that the container can see the host’s network.)
// For format details, see https://aka.ms/devcontainer.json. For config options, see the
// README at: https://github.com/devcontainers/templates/tree/main/src/python
{
	"name": "Python 3",
	// Or use a Dockerfile or Docker Compose file. More info: https://containers.dev/guide/dockerfile
	"image": "mcr.microsoft.com/devcontainers/python:0-3.11",

	// Features to add to the dev container. More info: https://containers.dev/features.
	// "features": {},

	// Use 'forwardPorts' to make a list of ports inside the container available locally.
	// "forwardPorts": [],

	"runArgs": [
		"--network=host"
	],
	// Use 'postCreateCommand' to run commands after the container is created.
	"postCreateCommand": "pip3 install --user -r requirements.txt"

	// Configure tool-specific properties.
	// "customizations": {},

	// Uncomment to connect as root instead. More info: https://aka.ms/dev-containers-non-root.
	// "remoteUser": "root"
}
What we’ve done is told the container to run a requirements.txt file at startup, and we’ve added the host’s network so that the container can resolve other containers running on your host. For example, I have redis running on a local kubernetes cluster, you may have postgres, etc. For now, let’s setup the container so that we can access my local redis.
Let’s now create a requirements.txt file in the root of the project. Add redis to the file as shown below and save everything.

We’re now ready to have VS Code to launch the devContainer. This will mount your local source code automatically for you.
Press F1 and select Reopen in Container. This tells VS Code to use the configuration files we just made and you’ll have a running Python3 development environment!

You’ll see VS Code re-launch and when it’s finished you should see something that looks like the following:
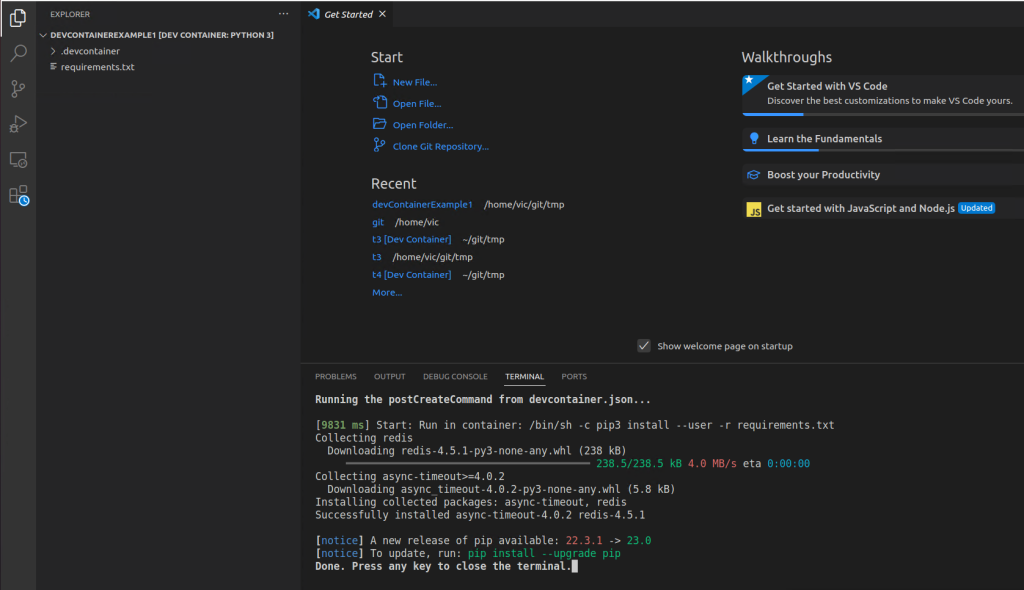
Note the upper left of the screen in the Explorer window — it show’s you’re running [DEV CONTAINER: PYTHON 3]. In the bottom terminal window you can see that it called our requirements.txt file and installed redis. You can press enter to clear it out.
Let’s now add a python file with the following contents. Note, this is an internal IP for a redis container running on my local k8s cluster. You’re redis IP will most likely be different. I’ve pasted the source code below the image.

Contents of test.py:
import redis
import os

rc = redis.Redis(host="10.96.214.55",port="6379",charset="utf-8", decode_responses=True)
rc.set("x","5")
print(rc.get("x"))
I can now run the code within VS Code as follows:
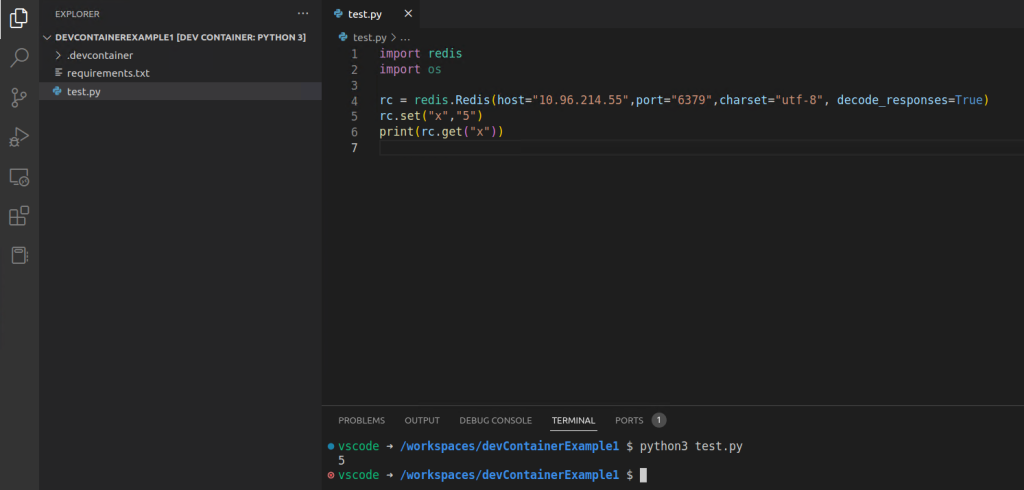
Success!
To disconnect from the running container, File > Close Remote Connection.
Using a Dockerfile Instead of an Image
The example above specified a pre-built docker image. You can also use a Dockerfile. Here’s a brief example.
Create a new folder, we’ll call it devContainerExample2 on your host PC and use File > Open Folder and select the devContainerExample2 folder. It will be empty.

Next, create a directory called “.devcontainer” and create a file under that directory and name the file “devcontainer.json” as shown below.

Source code for devcontainer.json:
{
    "build": { "dockerfile": "../Dockerfile" },

    "customizations": {
      "vscode": {
        "extensions": ["dbaeumer.vscode-eslint"]
      }
    },

    "forwardPorts": [3000]
  }
The example specifies a Dockerfile (we’ll create that next). It also shows how to add vscode extentions, as well as port forwarding. My example isn’t going to use those, but the options are there for you to pursue on your own.
Next, create a Dockerfile in the root of the project and put the following contents inside of it:

Dockerfile source:
FROM ubuntu
RUN touch /hello.there
We’re now ready to run this custom Dockerfile as a dev environment for this project!
Press F1 and select Reopen in Container. When VS Code refreshes, you should now be inside of the container. Open a terminal window via Terminal > New Terminal.
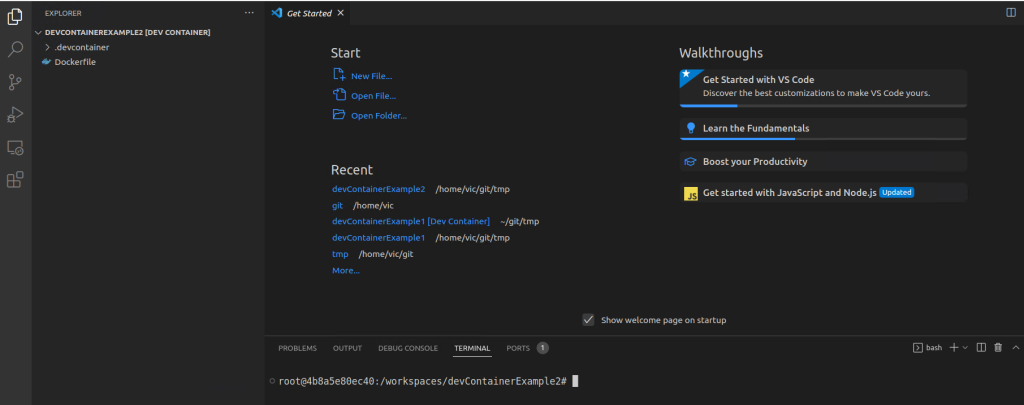
Verify that we’re using the Dockerfile we specified by making sure we see /hello.there in the root of the container.

Success!
To disconnect from the running container, File > Close Remote Connection.
In addition, you can add the runArgs block from the first example to the second example that uses a Dockerfile so that the generated container can access your local host network. For example:
{
    "build": { "dockerfile": "../Dockerfile" },

    "customizations": {
      "vscode": {
        "extensions": ["dbaeumer.vscode-eslint"]
      }
    },
    "runArgs": [
		    "--network=host"
	    ],
    "forwardPorts": [3000]
  }
Note: Once you launch the container with the updated devcontainer.json, you could export any environment variables your app may need via ‘export VAR=”value”‘, updating as needed for your use case.
Enjoy!

